

This article is a walk through for building & deploying a Windows Application in Visual Studio 2010.
I. Add a Installer Project to Solution
First, a installer project has to be added to the solution file. This project will be used to build executable setup files later. To add a new project under your solution, go to Tools->Options in the main tool bar. In the popup window, select Projects and Solutions->General, and check “Always show solution” check box. This will bring your root solution file to the front in Solution Explorer. Right click on the solution file, hit Add->New Project you will see a popup window like this:

In this popup window select Visual Studio Installer on the left panel, and select Setup Wizard. Give your installer a name in the Name field (this will be the name of your setup folder later) and hit OK. An installer project will be added in your solution file. If you want to remove a installer, remove it from the solution explorer and delete the project folder locally.
A popup window called Setup Wizard (1 of 5) will appear, hit Next->select “Create a setup for a Windows application” and hit Next->select necessary files to include (you can select all of them if you are not sure, just don’t forget to select the “Primary output from …”) and hit Next->add additional files (Readme or HTML files) and hit Next->hit Finish. A new installer project will be created under your solution.
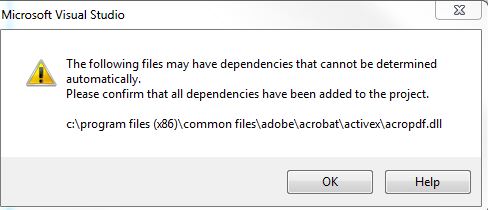
Notice that if you see a warning message as following, simply ignore it (close or hit OK), it won’t affect your later building process:
II. Build a Setup file
Once you have the installer project, right click on it and hit “Build“. A notification said “Build succeeded” will show on the lower left side of VS2010 if your build succeeds. After seeing this message, right click on the installer project and click “Open folder in Windows Explorer“, your execution file will be located in the Debug folder. You can run the application file locally or on other windows machines to install your project.
III. Give Your Application an Icon
Without setting a customized icon, your application will use a default icon for display after installation. Normally it looks like a text file and could be confusing.
To setup an icon for your application, you have to either download a .ico file or download an image file and convert it into .ico. Your icon file should be less than 49 pixel * 49 pixel otherwise VS2010 won’t recognize it and will produce a build failure. I like using https://icoconvert.com/ to do the job but you can choose your own website.
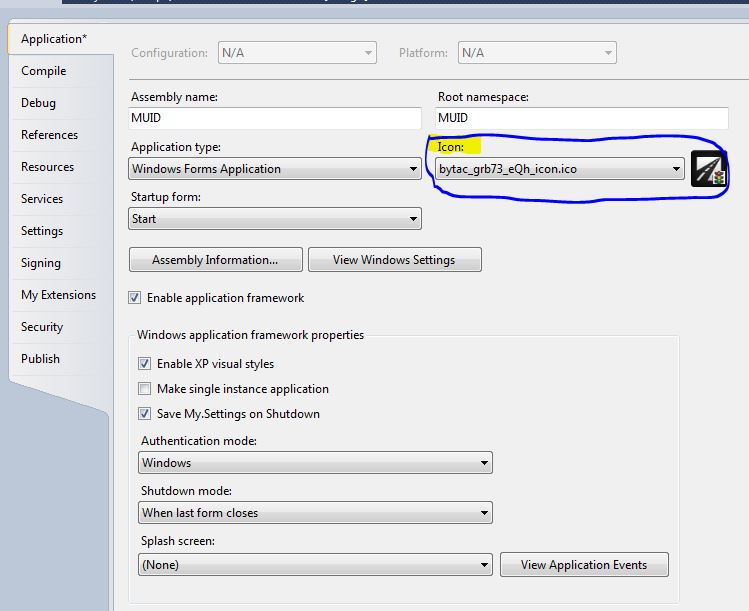
To setup an icon for your project, right click on your project (not the installer project but the project containing source code inside it) and hit “Properties“. Select “Application” panel and set your .ico file under “Icon:”. Here is an example after setting up an icon.
You can build your installer project after setting up your icon and will find a application file with your icon in the installed folder after installation.
IV. Create Shortcut to Desktop & Start Menu
Right click your installation project, go to View->File System. A panel will appear with 3 folders under “File system on Target Machine”. “Application Folder” contents will appear in the installed folder after installation, “User’s Desktop” contents will be copied to user’s desktop after installation and “User’s Programs Menu” will copies its contents to user’s Start Menu after installation.
Click “Application Folder”, right click on “Primary output from <your project name> (Active)” inside the application folder and hit “Create Shortcut to Primary output from <your project name> (Active)“. This will create a file with the type “Shortcut”. Rename the new created file with a name that will display under the shortcut after installation.
You can also setup an icon for your shortcut. Click on the shortcut file and in the Properties panel change “Icon” value from (None) to (Browse…). In the popup window select “Browse”. If you are setting up icon for shortcuts for the first time, a popup window will appear. Double click on “Application Folder” and then “add File…”, add your icon file to the application folder and hit OK. Select your icon in the Icon window and hit OK.
Drag your shortcut file to User’s Desktop folder and your installer will create a shortcut with specified name and icon on user’s desktop after installation. Repeat the create shortcut->change its name-> add icon action in the application folder and drag it into User’s Programs Menu folder will create a shortcut in user’s Start Menu after installation.
You can also drag the file first and change its properties (name & icon) inside User’s Desktop folder/User’s Programs Menu folder.
Notice that build installer project before setting up icon/shortcuts will not update your change into the build folder. You have to delete old build folder and build again after each update in your project.
V. Test your installer
After building the installer project, you should get your setup application file and Windows Installer Package in Debug folder (Right click on the installer project after build and hit “Open Folder in Windows Explorer” to reveal your setup file). Double hit on either one of them to start the installation and check whether everything is fine after installation.
Run your program through shortcuts/.exe file inside designated folder after installing and see if your application run normally or not. If you see errors related to resources, move your resources file to the same level where your source code lie in because Application.StartupPath + “\Resources\yourfile” may cause this error. Build your installer again (I delete and create a new installer every time I change my project) after updating/changing and test it again. Repeat the check->update->build process until your installer works fine and your installed application runs perfectly.
When distributing your setup file to others, you can give them the Windows Installer Package by itself or with the application file. Good Luck!
