

Before

After

Normally, if someone wants to add a scrollbar to html canvas, he/she adds style=”overflow: scroll;” to the <div> tag for that canvas — “overflow-x: scroll;” adds a horizontal scrollbar, “overflow-y: scroll;” adds a vertical scrollbar, and “overflow: scroll;” adds both. The pitfall of purely editing CSS file is: since <div> is a square, scrollbars will only appear on the edge of the square. Thus, this method WILL NOT WORK if we need a separate scrollbar on a random location. Luckily, html range slider will offer some flexibility to this issue.
To add a range slider, type as followings in your html code:
<!-- yourFunction() specifies what will happen after scroll -->
<input type="range" min="1" max="26" step="1" value="1" onmouseup="yourFunction()" />
You will get a range slider like this:
This looks ugly for sure. In order to make it looks more like a scroll bar, we have to write CSS code to improve the appearance. Also, to make this range slider looks consistent across different browsers, CSS code for all major browsers are needed. In my example, the following code works for Chrome/Safari/Opera, Firefox, and IE.
HTML:<!DOCTYPE>
<html>
<head>
<link href="rangeslider.css" rel="stylesheet"> // CSS file
<script>
function myFunc(){ // scroll
}
</script>
</head>
<body>
<input type="range" min="1" max="26" step="1" value="1" onmouseup="myFunc()">
</body>
</html>/* rangeslider.css in this case */
/* universal property */
input:focus{
outline: none;
}
input[type=range]{
width: 680px; // bar width
}
/********************** style for chrome, safari, opera **********************/
input[type=range]{
-webkit-appearance: none; // important
}
// track means the bar
input[type=range]::-webkit-slider-runnable-track {
background: #ddd;
border: none;
height: 5px;
}
// thumb means the scrolling thumb
input[type=range]::-webkit-slider-thumb {
-webkit-appearance: none;
border: none;
height: 5px;
width: 36px;
background: #4682B4;
}
/*************************** style for Firefox ************************/
input[type=range]::-moz-range-track {
height: 5px;
background: #ddd;
border: none;
}
input[type=range]::-moz-range-thumb {
border: none;
height: 5px;
width: 36px;
background: #4682B4;
}
/******************** style for IE: fill color using different ways *****************/
input[type=range]::-ms-track {
height: 5px;
background: transparent;
border-color: transparent;
border-width: 6px 0;
color: transparent;
}
input[type=range]::-ms-fill-lower {
background: #ddd;
}
input[type=range]::-ms-fill-upper {
background: #ddd;
}
input[type=range]::-ms-thumb {
border: none;
height: 5px;
width: 36px;
background: #4682B4;
}
input[type=range]:focus::-ms-fill-lower {
background: #ddd;
}
input[type=range]:focus::-ms-fill-upper {
background: #ddd;
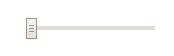
}After link the css file you’ll get:

Now it look more like a scroll bar, and you can fill in the mouseup function to get a scrollbar like effect.
Notice
1. For Chrome/Safari/Opera, “-webkit-appearance: none;” is a must have, this line will disable the original design and allow new design.
2. The CSS file has a consistent design for different kinds of browsers, written together in one single file.
